
Over the years, brushes and rollers
have been largely used for applying paints on walls but there’s been a gradual
departure from this trend to a faster, easier and better technique which is
known as spray painting for buildings. Although the concept of spray painting
is not new, it was largely limited to the manufacturing industry.
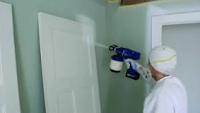 Now with the
advent of wall paint sprayers for all kinds of walls including block-walls
common to us here, painters can now spend more productive time on something
else rather than stick to the walls like geckos; moving their hands up and down
almost endlessly.
Now with the
advent of wall paint sprayers for all kinds of walls including block-walls
common to us here, painters can now spend more productive time on something
else rather than stick to the walls like geckos; moving their hands up and down
almost endlessly.

The spray technology for wall
painting comes in various forms; each new entrant is an improvement on previous
ones. The electrically-powered types are in common use across the world. There
are some that are designed for simple interior applications; flexible enough for
use by amateurs while others are best handled by expert painters often due to
their speed of flow configurations and control mechanisms.
The whole idea is to
save the stress and time-lag associated with the traditional method. In terms
of time, it saves up to 60% or more especially when applied to non-lattice
surfaces and in fact a chunk of this short time is not even lost in the actual
painting exercise but in the pre-painting (i.e. in setting up the spray
equipment) and post-painting (i.e. in cleaning up the equipment after use) processes.
It has been adjourned less stressful and more exciting by users and although
the equipment for applying the paint may differ, it’s the same paint.
Manufacturers
of paint sprayers often give instructions and technical details on how-to and
when best to use their products; covering aspects of surface conditions, power specs
and weather. It is instructive to note that a study of some of these specifications
show that these products are very suitable for use in this part of the world;
the question then is –Why do our painters still opt for the slower and more stressful
‘roller-and-brush’ system? Most of them complain that the sprayers aren’t
readily available, other say they are mindful of the ‘wastage factor’ often
ascribed to art of spraying.
Just imagine what your car would look
like if it were painted with a roller or brush. Now you have an idea of what
this is about. Here is how it works;
- Go buy or rent an original wall-paint
sprayer. Be careful to select one that is easier for you to use. If it’s not
available in the market, place order for importation –It is worthwhile
especially for continuous use. Also buy the paints whether emulsion or texcote you
want to apply.
- Once you have them and you are ready
to go, make the area safe for work by removing any hazardous object especially those
that can make you trip, slip or injure while working or things that can harm
the equipment especially its hose.
- Cover all surfaces you don’t want to
paint like windows, doors, floors, fittings, fixtures etc with thick paper, drop
clothes or any polythene material and prepare punctured or uneven surfaces with
fillers.
- Set the equipment according to the
manufacturer’s instruction.
- Mix the paint to produce your desired
colour or texture. Also strain and stir it thoroughly to avoid clogging by
adding a suitable solvent like water (for water-based paints) and petroleum
motor spirit (for oil-based paints).
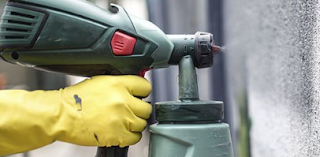
- Then pour it into the equipment’s
tank and power the equipment.
- Point the nozzle of the sprayer gun
directly at the surface and maintain a close and nearly even distance from the
surface of the wall throughout (say about 12 Inches or 300mm).

- Start with the corners and
protrusions first before facing the other regular surface area.
- Start moving the gun or nozzle before
you shoot or spray and keep the gun moving in long, straight strokes in either
direction. Avoid staying too long on one spot, keep moving as you ensure that
your paint overlap correctly. Don’t
fidget unnecessarily so as not to create stripes. Once you are fatigued, close
the nozzle tap and relax.
- Occasionally you may have to wipe the
nozzle tip with a soft cloth to make it clear because some paints may have
clogged around it and you may also use small brushes to correct some defects
that may arise from spray errors.
- The outcome is a brightly finished
wall.


The same process applies to ceiling or under-slab painting.

Thanks Seravina Danniella
ReplyDeleteThis is really nice information you posted, It's very informative and definitely, will be helpful for those who are looking for Painting Interior Walls. To know more about visit Fairhaven Painting
ReplyDelete